
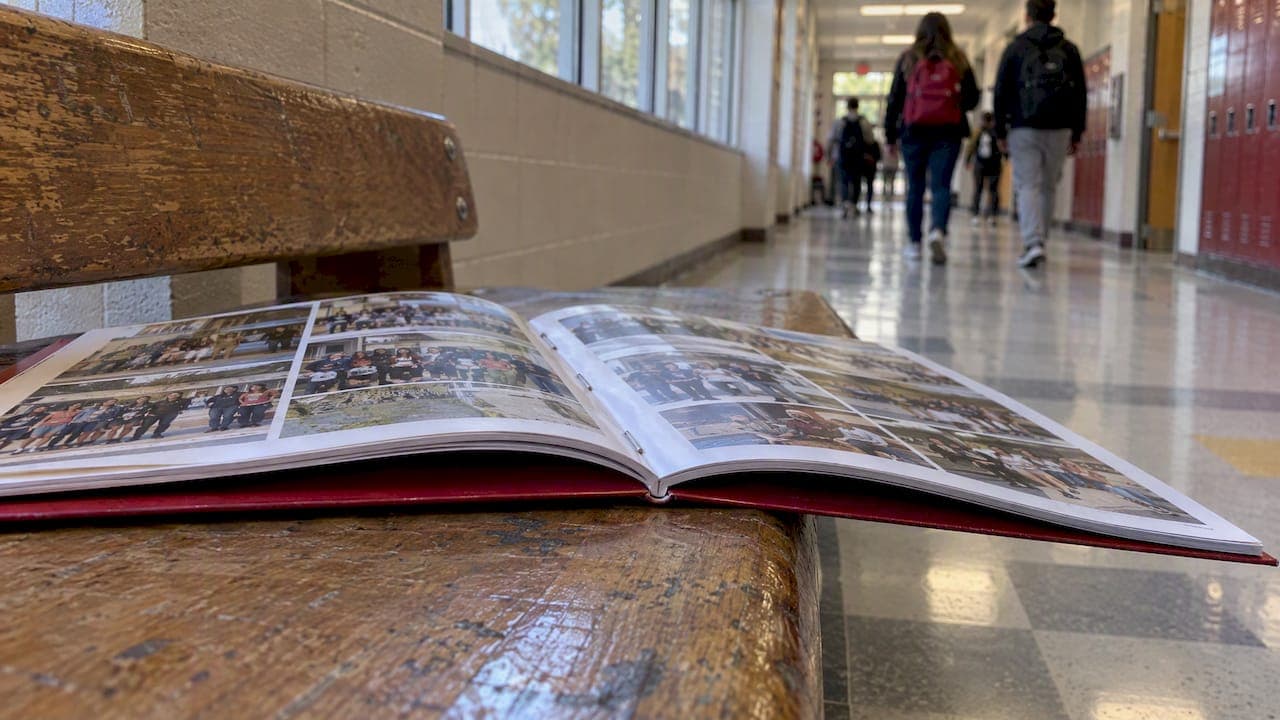
Saddle stitch is commonly chosen for school yearbooks with page counts below about 64 pages, and it's the most affordable way to produce one. The essential rule is that the final page count must be a multiple of four, since every folded sheet adds exactly four pages. Check your count first, then move to file setup.
TL;DR:
- When the final count is not divisible by four, printer software usually adds blank pages at the back, potentially leaving an awkward gap before the back cover.
- Design in reader order and export a single page PDF unless your printer requests imposed spreads; add 0.125 inch bleed for edge to edge artwork.
- Apply creep compensation at roughly 16 pages, or 12 on heavier stock, and keep critical text at least 0.25 inch from the fold.
- Order 15% to 20% above the confirmed count to cover late signups, staff copies, and reprints without scrambling for additional books.
Table of Contents
- What saddle stitch binding is and how it's made
- Page-count rules, recommended limits, and staple placement
- File setup: bleed vs. no-bleed, reader spreads vs. printer spreads
- Creep, imposition, and how to compensate for it
- Paper, grain direction, and trim considerations
- Production timeline, cost trade-offs, and when to switch bindings
- How TrailMark Yearbooks helps schools produce saddle-stitched yearbooks
- Design considerations specific to saddle stitch: spine width and cover wrap
- Choosing paper weight and finish for durability and looks
- Advantages and disadvantages versus other binding methods
- Visual and structural durability in school environments
- Typical cost range and what drives pricing
- Author perspective: quick tips from an adviser
- Get started: order samples or request instant pricing from TrailMark
- FAQ
- Sources
What saddle stitch binding is and how it's made
Saddle stitching folds printed sheets in half and nests them inside one another, then drives staples through the spine fold to hold the booklet together. Each individual sheet, once folded, contributes four pages to the final book, which is the physical reason page counts can't land on odd totals or non-multiples of four.
This is also why saddle stitch costs less than other binds: there's no glue, no heated binding step, and far less handling than a hardcover or perfect-bound book.
- No adhesive or heat-based binding step is required.
- Books open flat, which helps with spreads that cross the spine.
- Production is faster because stapling is mechanically simpler than gluing a spine.
Page-count rules, recommended limits, and staple placement
Your total page count has to be divisible by four. If it isn't, your printer's software will insert blank pages to make the math work, usually at the back, which can leave an awkward gap before the back cover. According to SAIC's service bureau, every folded sheet produces four pages, so final totals need to land on 4, 8, 12, 16, and so on.
For school yearbooks, saddle stitch works well across a fairly wide range:
- Short class booklets and small school yearbooks: 8 to 60 pages is a comfortable, well-supported range.
- Beyond roughly 64 pages, spine bulge and creep start working against you, and another binding method becomes more practical.
Minimum trim size matters too. Staples need enough margin from the trim edge to sit securely without tearing through the paper, so very small booklet formats aren't a good fit for saddle stitch regardless of page count.
File setup: bleed vs. no-bleed, reader spreads vs. printer spreads
How you export your yearbook file determines whether your prepress team can run it without delays. Follow these steps:
- Decide if you need bleed. If any photo or color block runs to the trimmed edge, you need full bleed. If every page has a white margin, you don't.
- Design in reader spreads, export as single pages. Most digital print shops prefer single-page PDFs in reader order rather than pre-imposed spreads.; prepress handles imposition on their end, according to the College for Creative Studies Imaging Center.
- Use InDesign's Print Booklet feature only when your printer specifically asks for imposed printer spreads. Otherwise, submitting single pages avoids mismatched imposition between your software and theirs.
- Include approximately 0.125 inch (3 mm) of bleed on bleeding pages on every bleeding page, and let crop marks print outside the trim line rather than hand-placing them.
Full-bleed booklets get printed on a larger sheet and trimmed down afterward, which is why bleed jobs require imposition and crop marks that no-bleed jobs skip entirely. For a full export checklist before you submit files, see our guide on what makes a print-ready yearbook PDF.
Pro Tip: Flatten transparency and embed all fonts before export, since missing fonts are the most common reason a yearbook file bounces back from prepress.
Creep, imposition, and how to compensate for it
Creep, sometimes called shingling, happens because nested sheets sit at slightly different depths once folded. The inner pages push outward past the outer ones, which can shift your margins and misalign content that crosses the spine. PDFPress recommends applying creep compensation once a booklet reaches roughly 16 pages, or around 12 pages when you're printing on heavier stock.
- Creep compensation formula: total creep is roughly the number of sheets minus one, multiplied by paper caliper, multiplied by two, then distributed proportionally across the nested sheets.
- Most imposition software can automate creep compensation calculations based on paper thickness and page count.
- Ask your printer directly whether they apply automatic shingling adjustment, rather than assuming it happens by default.
Creep matters most for any image or text block that crosses a two-page spread. If your margins are tight, a few millimeters of inward shift can crop a face or cut off a caption. Keep critical content at least about 0.25 inch from the spine fold on crossover spreads to avoid creep cut-off, so creep compensation doesn't eat into it unexpectedly.
Paper, grain direction, and trim considerations
Grain direction should run parallel to the spine fold. When it doesn't, covers and interior sheets are more likely to crack or fold unevenly along the spine, an issue PDFPress flags as a common cause of poor fold quality on heavier stock.
- Interior text pages typically use a lighter weight stock that folds cleanly without adding spine bulk.
- Cover stock runs heavier for durability, and very heavy covers often need to be scored before folding to prevent cracking along the spine.
- Trim size needs enough margin from the fold for a secure staple bite; undersized trims make stapling unreliable regardless of stock weight.
For a rundown of common interior and cover stock choices, our paper options guide for school staff walks through what each finish looks like in a finished book. If you're prepping photo-heavy spreads, getting color profiles right before you send files matters just as much as paper choice. A useful reference on preparing images for print covers the color-profile basics that keep photos from shifting tone once printed.
Production timeline, cost trade-offs, and when to switch bindings
Saddle stitch is typically the fastest commercial binding to produce because there's no glue-curing step involved, something SAIC's service bureau attributes to stapling being mechanically quicker than perfect binding. Full-bleed jobs add time and cost compared to no-bleed layouts, since they require imposition onto larger sheets and precision trimming afterward.
- Page count beyond roughly 64 pages is the point where spine bulge and creep make saddle stitch harder to produce reliably.
- Past that threshold, square-back binding, perfect binding, or wire binding becomes the more practical choice. Our overview of hardcover and alternative binding types breaks down when each one makes sense.
- Build in a 15 to 20% buffer above your confirmed order count to cover late sign-ups, staff copies, and reprints, a planning habit worth locking in before you finalize quantities. Our yearbook quantity ordering checklist walks through how to size that buffer against your budget.
How TrailMark Yearbooks helps schools produce saddle-stitched yearbooks
We built our pricing to be instant and all-inclusive: enter your specs online and see a transparent per-book cost with no sales call and no hidden add-ons. Our standard turnaround runs 2 to 3 weeks, which fits a saddle-stitched book's naturally fast production cycle.
We support whichever design tool your staff already knows, including Canva, Adobe InDesign, and our own online creator, so advisers aren't forced to learn new software mid-project. If you want to confirm paper feel or print quality before committing, requesting a sample is the simplest way to check both against our file-setup guidance.
Design considerations specific to saddle stitch: spine width and cover wrap
Saddle stitch has no true spine, just a folded edge, which changes what's possible on your cover compared to a perfect-bound or hardcover book. There's no flat spine panel wide enough to print a readable title or school name sideways, so most saddle-stitched yearbook covers put all identifying text and art on the front panel instead of wrapping it around a spine.
Cover wrap is also more limited. On a perfect-bound book, designers can run a single image or design element across the front cover, spine, and back cover in one continuous wrap. On a saddle-stitched book, that wrap has to account for the fold itself rather than a flat spine width, so any image crossing from front to back cover needs extra care in layout to avoid looking pinched or misaligned at the staple line.
Keep key design elements, especially text, away from the immediate staple area on the front and back cover. A staple sitting a quarter inch from a logo or a name reads as sloppy once the book is bound. Designers accustomed to working with spine width calculations from perfect binding need to unlearn that habit here: with saddle stitch, the relevant measurement is fold position and staple clearance, not spine thickness.

Choosing paper weight and finish for durability and looks
Paper choice affects both how a yearbook survives a school year and how photos look once printed. Interior text and photo pages typically run on a lighter weight stock, usually a satin or gloss finish that holds color and contrast well for photography-heavy spreads. Matte finishes reduce glare and fingerprints but can mute color saturation slightly on photo-dense pages.

Cover stock needs to be heavier than interior pages to survive being carried in backpacks, signed by classmates, and stacked on shelves. A heavier cover with a gloss, matte, or soft-touch laminate adds scuff resistance, which matters more for saddle-stitched books since there's no rigid board layer like a hardcover has to protect the pages underneath.
When choosing a finish, weigh how the book will actually be used: a book meant for heavy signing and handling benefits from a tougher laminate finish over the cover, while a book prioritizing photo reproduction quality might lean toward a higher-gloss interior stock. Our paper options guide breaks down specific stock and finish combinations by use case, which is worth reviewing before locking in a spec with your printer.
Advantages and disadvantages versus other binding methods
Saddle stitch wins on cost and speed by a clear margin among common yearbook binding methods, and books open completely flat, which is genuinely useful for spreads with photos or layouts crossing the center. There's no minimum order complexity tied to binding type the way there sometimes is with hardcover production, and turnaround is typically the shortest of the common options since there's no adhesive curing step involved.
The trade-off is durability and page capacity. A stapled book has no rigid protective cover, so corners and edges show wear faster than a hardcover book over a full school year of handling. Page count is also capped in practice: once you're past roughly 64 pages, spine bulge from the nested sheets makes the staple bind less reliable, and that's where perfect binding or a hardcover approach takes over.
For a smaller yearbook or a budget-constrained program, saddle stitch is the practical leading choice precisely because it avoids the added cost and production time of glue binding or rigid board covers. For a larger program producing a thick, heavily photographed annual yearbook, the page-count ceiling makes it worth comparing against perfect binding, which our guide to alternative binding types covers in more detail.
Visual and structural durability in school environments
A saddle-stitched yearbook holds up reasonably well for its intended lifespan: one school year of being carried, signed, and stored in a locker or backpack. The staples themselves rarely fail under normal handling, and because the book opens flat, pages don't strain against a stiff spine the way some hardcover bindings can over repeated opening.
Where wear shows up first is the cover edges and corners, since there's no rigid board layer absorbing impact the way a hardcover does. Students signing yearbooks with markers near the staple line can also occasionally catch the staple itself, though this is a minor cosmetic issue rather than a structural one.
For elementary and middle school programs, where yearbooks tend to be shorter and handled for a shorter window before being archived at home, saddle stitch durability is rarely a practical concern. For high school programs producing a book meant to be a long-term keepsake, a heavier cover stock with a protective laminate finish, discussed in the paper section above, closes most of the durability gap without switching binding methods entirely.
Typical cost range and what drives pricing
Saddle stitch is consistently the most affordable binding method for a school yearbook, largely because it skips the adhesive, heated binding, and rigid board costs that hardcover and perfect-bound books carry. Within saddle stitch itself, a handful of factors move the price: page count, whether pages are full-bleed or have a white border, cover stock weight, and any added finishing like foil stamping or spot UV.
On our own production and finishing page, a soft cover saddle-stitched book runs from a perfect bound soft cover at $1.60 per book, with optional add-ons like inside cover duplex printing at $0.40 per book or a flat foil stamp or spot UV at $4.25 per book for schools wanting a premium cover touch. Freight to the school adds $1.00 per book when included rather than arranged separately.
Full-bleed layouts cost more to produce than no-bleed layouts because they require imposition onto a larger press sheet and precise trimming afterward, a step the Imaging Center at College for Creative Studies notes is skipped entirely on no-bleed jobs. Quantity also matters: most programs see a lower per-book cost as order volume increases, which is why locking in a realistic headcount early, with a buffer for late orders, pays off at the pricing stage rather than after files are already submitted.
Author perspective: quick tips from an adviser
Two things save advisers the most grief: confirm your final page count is divisible by four before you touch layout, and build your ordering buffer into the budget from day one rather than scrambling for reprints in May. Saddle stitch rewards advisers who plan the math early and leaves little room for correcting it late.
— Jace
Get started: order samples or request instant pricing from TrailMark
Once you've confirmed your page count and file setup, getting a quote takes a few minutes, not a phone call. We post instant, all-inclusive pricing online so you can see your real cost before committing to anything.
- Get instant pricing for your page count and cover options with no sales pitch involved.
- Request a sample to check paper weight and print quality against what your students expect.
- Use our free design support, whether your staff works in Canva, InDesign, or our online creator, to finalize files before submission.
FAQ
What is a saddle stitch on a book?
Saddle stitch is a binding method where folded sheets are nested inside each other and stapled through the fold line, rather than glued. It's named for the way the booklet sits open over a saddle-shaped support during stapling, and it's the standard method for short books like school yearbooks.
What does a saddle stitch book look like?
A saddle-stitched book has visible staples running along the spine fold, usually two or three depending on the page height, and the book opens completely flat since there's no rigid glued spine. The cover and interior pages are the same single fold rather than a separate wrapped spine panel.
How do you create a saddle stitch booklet?
Start by confirming your page count is a multiple of four, since printers add blank pages otherwise. Design in reader-order spreads, export single-page PDFs with 0.125 inch bleed if any content touches the trim edge, and apply creep compensation once your page count reaches roughly 16 pages, as outlined by PDFPress.
What is a saddle stitch booklet used for?
Saddle stitch booklets suit shorter publications, generally 8 to 60 pages, where low cost and fast turnaround matter more than the extra durability of a hardcover. School yearbooks, programs, and short catalogs are common uses because the format keeps printing costs down while still allowing full-color, photo-heavy layouts.
Sources
- Saddle Stitch Books – SAIC Service Bureau
- Build a print-ready saddle-stitch booklet: the 4-page rule, reader vs printer spreads, creep compensation, and binding · PDFPress
- Saddle-Stitch Booklets – Imaging Center