
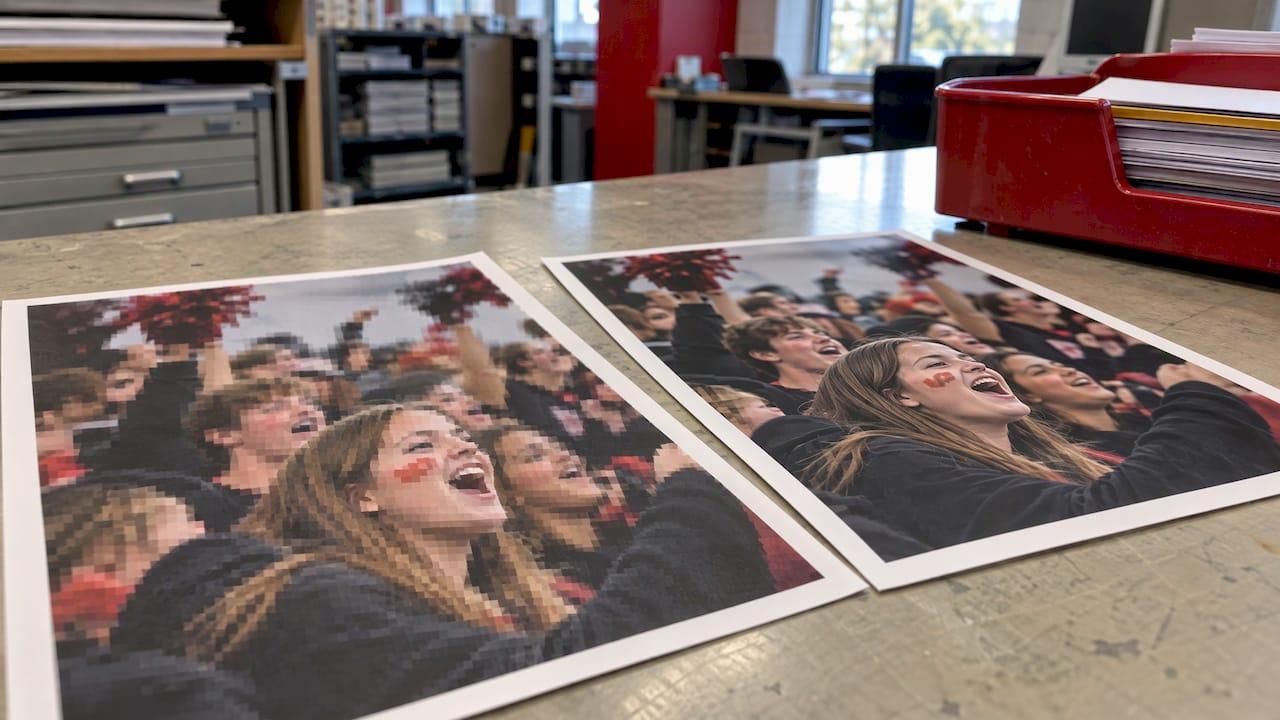
Compress a yearbook photo once, at the very end, at the highest JPEG quality your software offers, and never shrink the pixel dimensions below what the page needs. That one rule prevents most blurry, blocky or rejected pages. Compression is a trade: it makes a file smaller by throwing away data, and every extra round of it throws away more. Handled well, it is nearly invisible in print. Handled carelessly, it is the reason a sharp photo on a laptop looks soft on paper.
This guide is for yearbook advisers and school administrators who need a clear workflow, not a photography course. It explains what compression does, where in your process it belongs, the settings to use, and how to troubleshoot a file that is too big, too small or visibly degraded.
TL;DR
- Compression means a smaller file at the cost of some image data. Resolution (pixel count) is a separate setting, and for print it matters more.
- Keep originals untouched. Compress only copies, and only once, at the final export.
- For print, aim for 300 PPI at the size the photo appears on the page. Web-sized images stretched to fit look pixelated.
- Save JPEGs at maximum quality. A once-saved JPEG is fine, a JPEG re-saved five times is not.
- If a file is rejected or looks soft, check pixel dimensions first, then format, then how many times it has been saved.
Table of Contents
- Compression versus resolution: the two settings advisers mix up
- When in your workflow to compress
- The settings that protect print quality
- Compressing page exports, not just photos
- Troubleshooting: oversized, rejected or blurry files
- A quick checklist before you submit pages
- Our perspective
- How TrailMark fits into the workflow
- FAQ
- Sources
Compression versus resolution: the two settings advisers mix up
Most "my yearbook photo looks bad" problems come from confusing two different things.
Resolution is how many pixels the image holds, and how densely they are packed when printed. It is measured in pixels per inch (PPI, often called DPI). A photo that is 1,200 pixels wide printed at 4 inches wide is 300 PPI. Stretch the same photo to 8 inches and it falls to 150 PPI, and the printer has to guess at the missing detail.
Compression is how the file is stored. A JPEG shrinks a photo by discarding fine detail the eye is least likely to miss. Save at high quality and the loss is hard to see. Save at low quality and you get blocky patches, smeared edges and halos around text or faces.
These stack. A small image saved at low quality is the worst case: too few pixels, and those pixels already damaged. Fixing one does not fix the other, which is why a photo that was shrunk to email size cannot be rescued by saving it at "maximum quality" afterward. The detail is gone.

When in your workflow to compress
The professional print-industry guidance is consistent on this: compression is a decision made at the moment you save, not something to apply along the way. The ATPI guide to preparing images for publications advises saving a JPEG at maximum quality and warns to save an image as a JPEG only once, because repeated JPEG saves can dramatically reduce quality.
In practice that gives you a simple three-stage routine.
- Capture and collect. Ask photographers and student staff for the original files, straight from the camera or phone. Do not accept screenshots, photos sent through chat apps or images pulled from social media, which have usually been compressed and resized already.
- Edit. Do crops, color and sharpening on a copy. Keep the original in a separate folder you never overwrite.
- Export once. When the photo is cropped to its final size, save it a single time as the format your page layout needs. This is the only compression step.
A habit worth building: name folders "Originals" and "Ready for pages" and let only the second one touch your layout. Our guide on a yearbook photography checklist for school coordinators covers how to get good originals from the start.
The settings that protect print quality
Resolution: 300 PPI at final size
ATPI explains that the PPI of an image should be roughly 1.5 to 2 times the line screen (LPI) of the publication, and that yearbooks and magazines call for 300 PPI, where newspapers get by with around 160. In Photoshop, the same guide says to open Image Size, uncheck Resample Image so that width, height and resolution stay linked, and then set 300 PPI. Unchecking Resample matters: it changes how densely the existing pixels are printed rather than inventing new ones.
The practical consequence is the "size check": look at the pixel dimensions and divide by the inches the photo will fill. A photo that will run 5 inches wide should be about 1,500 pixels wide at minimum. A full-page photo on an 8.5 by 11 inch page needs far more. If the number comes out well under 300, the photo will look soft in print no matter how it is saved. We walk through this math in Yearbook Photo Resolution: What Students and Advisers Need to Know.

Format: JPEG at maximum quality, or lossless when you need it
According to the same ATPI guide, final photos can be saved as a JPEG at Maximum quality with the Baseline (Standard) option, or as PSD or PNG when transparency is needed. It also notes that some yearbook companies do not want PNG files, so confirm with your representative before building a whole book around them.
A simple way to remember it:
| Situation | Best choice |
|---|---|
| Regular photo going on a page | JPEG, maximum quality, saved once |
| Graphic or logo with a transparent background | PNG or PSD, if your printer accepts it |
| Photo you plan to keep editing | Keep the original or a lossless working copy, not a JPEG |
| Image taken from the web | Avoid; usually too small and already compressed |
Sharpening: the step people skip
Resizing softens an image slightly. ATPI's Lightroom instructions set the export resolution to 300 under Image Sizing and apply Output Sharpening for matte or glossy paper if the image was not sharpened earlier. Lightroom also has a useful safety feature: because it never overwrites the original, you can export a JPEG again as often as you like without the repeated-save penalty. For advisers who manage hundreds of photos, that is a good reason to keep your library in a catalog tool and export from it, rather than saving over files in a folder.
Compressing page exports, not just photos
Photos are one half of the story. The other is the finished page file that goes to the printer. A page that was exported as a PDF with aggressive image downsampling can ruin photos that were perfect on their own.
When you export from InDesign, Canva or another layout tool, look for the image-quality or compression options in the export dialog and choose the high-quality or print preset rather than a "smallest file size" or "web" preset. Our walkthrough of what makes a print-ready yearbook PDF correct covers bleed, fonts and image settings, and a single saved preset in InDesign removes most of the guesswork, as shown in One InDesign Preset That Stops Yearbook Reprints.
The reasoning is the same as for single photos: let the layout software compress once, at the end, at the quality level meant for print. Do not export a PDF, open it, and re-export it. Each pass can recompress the images inside.
Troubleshooting: oversized, rejected or blurry files
When a file misbehaves, work through the causes in this order. It runs from most to least common.
The file is too large to upload or email
A big file is usually a sign of lots of pixels, which is good for print. Before shrinking anything:
- Check whether it is a working file. Layered PSD files and uncompressed originals can be huge. Export a flattened JPEG copy at maximum quality for the page instead.
- Check for hidden oversize. A 6,000 pixel wide photo placed in a 3 inch box has far more data than it needs. Resizing the copy to about 300 PPI at its placed size cuts the file dramatically with no visible loss.
- Split the delivery. If a whole folder is too heavy to send in one go, send it in several batches rather than compressing every photo harder.
- Never fix size by lowering quality below maximum on a photo already at its target dimensions. Reduce pixels to the size needed, then keep quality high.
The file looks pixelated or blocky in print
Pixelation (square stair-steps on edges) points to too few pixels. Blockiness (smudged 8-pixel patches, ringing around edges) points to heavy or repeated JPEG compression. Open the image at 100% zoom and look closely. Then:
- Read the pixel dimensions and compare with the placed size, as above.
- Look at where the file came from. A screenshot or a photo that passed through messaging apps and social platforms is the most common culprit.
- Ask the photographer for the original. If it does not exist, shrink the photo on the page, so the same pixels cover fewer inches and the effective PPI rises.
- Skip "upscaling" tricks as a rescue. Enlarging a small file adds pixels but not detail.
The Common Yearbook Photo Quality Issues guide shows what each of these problems looks like on a page, which helps student editors spot them early.
The file was rejected or the colors look off
Check the format first. If you used PNG, confirm your yearbook company accepts it. If colors shifted between screen and print, remember that screens use RGB light and presses use ink, so some saturated blues and greens will always print duller than they look on a monitor. Ask for a printed proof of a few pages before committing to the whole book.
The file has been saved too many times
There is no reliable way to restore detail that repeated saves removed. The prevention is the workflow above: originals preserved, one final export. For student staff who work from shared drives, a short written rule helps. Our school yearbook policy best practices for advisers includes ideas for putting file handling in writing so it survives staff turnover.
A quick checklist before you submit pages
- Every photo is at or near 300 PPI at its placed size.
- Photos are JPEGs saved once at maximum quality, or lossless where transparency is needed.
- No screenshots, social media downloads or chat-app images.
- PDF export used the print or high-quality preset, not a web or smallest-size one.
- Originals are stored separately and unchanged.
- A couple of pages were checked at 100% zoom for blockiness and softness.
For a deeper look at what separates a smooth print run from a reprint, see Stop Reprints: Yearbook Print Quality Workflow Advisers Can Use and the common yearbook design errors adviser guide.
Our perspective
Most advisers we talk with do not need to become image experts. They need a short rule they can hand to a student staff: keep the original, export once, and keep it big enough for the page.
That is also why we built our process around the adviser's real situation. You can design in Canva, InDesign or our online creator, we offer free design assistance, and our team has more than 50 years of combined experience to lean on when a file looks wrong. We would rather help you catch a soft photo before it is printed than have you discover it in a box of finished books.
A yearbook is a once-a-year product, so the mistakes are expensive to learn from. Good file habits are the cheapest insurance there is.
Jace
How TrailMark fits into the workflow
If you would rather spend your time on content than on file settings, we are built for that. TrailMark Yearbooks produces yearbooks for elementary, middle and high schools, with instant all-inclusive pricing online, no signup, no sales pitch, no hidden fees and shipping included. Turnaround is 2 to 3 weeks, with no order deadlines, and free design assistance is available while you build your pages.

You can see how the production options work on our main site, or look at the published per-book add-on prices on the printing options page: for example, a perfect bound soft cover is $1.60 per book and a 150 point board hard cover is $1.50 per book. Schools that prefer to hand off the layout can look at our Yearbook Direct option for middle schools and K-8, where we create the book for you.
FAQ
Does compressing a photo always make it look worse?
Not visibly, if it is done once at high quality. A single JPEG save at maximum quality discards data most people cannot see in print. The visible damage comes from low-quality settings, very small starting images, or saving the same JPEG repeatedly.
What resolution should yearbook photos be?
Aim for 300 PPI at the size the photo will print on the page. That is the figure the ATPI image guide gives for yearbooks and magazines. Photos taken straight from a modern camera or phone usually meet this at normal page sizes.
Should I send JPEG or PNG files?
JPEG at maximum quality is the safe default for photos. PNG is useful when you need transparency, but ATPI notes that some yearbook companies do not want PNG files, so confirm what your production team accepts first.
Can I fix a blurry photo by compressing or enlarging it?
No. Neither step adds detail. The workable fixes are to find the original file, to place the photo smaller on the page, or to choose a different photo.
My file is too big to send. What should I do?
First check whether you are sending a layered working file or a photo with far more pixels than its placed size needs. Export a flattened copy at about 300 PPI at its placed size, keep the quality at maximum, and send large folders in batches.