
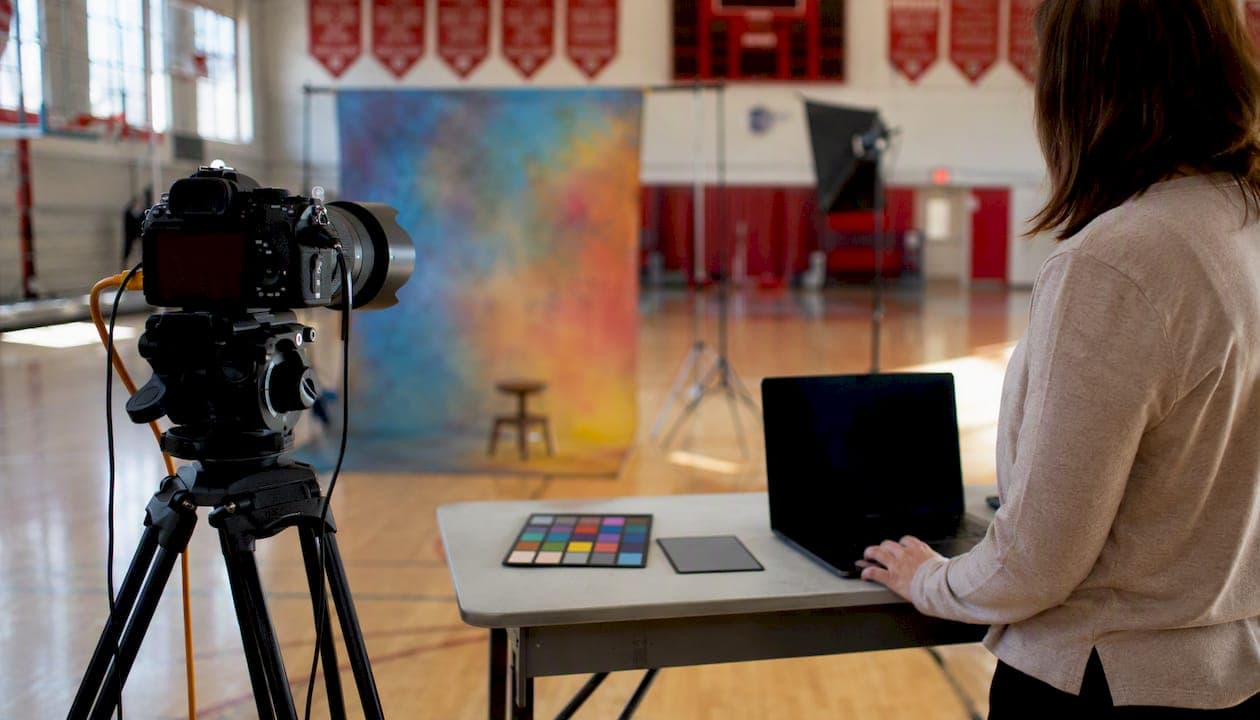
Low resolution, blur, exposure problems, color shifts, noise, compression artifacts, and poor cropping are the most common yearbook photo quality issues advisers face every season. The fix for each is different, and knowing which problem you're looking at determines whether you reshoot, repair, or accept.
Here's the short version of what you'll encounter and what to do first:
- Low resolution / pixelation: The image looks blocky or soft when enlarged. Check pixel dimensions against final print size at 300 DPI. Reshoot or request the original file.
- Blur (camera shake): Directional smearing across the whole frame. Reshoot; sharpening tools won't recover it.
- Blur (missed focus): Localized softness, often on the eyes. Reshoot if the subject is the face.
- Blur (subject motion): Ghosting or streaking around moving parts. Reshoot with a faster shutter speed.
- Overexposure / clipped highlights: White areas with no detail. Minor cases: recover in Lightroom or Camera Raw. Severe cases: reshoot.
- Underexposure: Dark, muddy shadows. Recover if the file is RAW; reshoot if it's a compressed JPEG with heavy noise.
- Color / white balance problems: Skin tones appear orange, green, or blue. Correct in editing software; verify against a calibrated display.
- High ISO noise: Grain and color speckles in shadows. Use a denoise tool (Lightroom's Denoise, Topaz DeNoise AI) for mild cases; reshoot for severe ones.
- Compression artifacts: Blocky edges and banding, usually from social-media re-exports. Request the original camera file.
- Unintended cropping / framing: Heads cut off, subjects off-center. Reshoot or reframe if the crop is severe; minor adjustments are acceptable.
- Scanned-photo degradation: Moiré patterns, color casts, halftone dots. Rescan at 600 DPI minimum; request the original print if available.
- File corruption: File won't open or shows garbled data. Request a fresh export from the original source.
The three root causes behind most of these problems are low light, aggressive compression, and low resolution, and they each require a different corrective path. Knowing which one you're dealing with saves time. The standard print target is 300 DPI at final printed dimensions, embedded with an ICC color profile. Trailmarkyearbooks builds its production workflow around these specs, which means advisers who follow the rules below will rarely face a surprise at press time.
Table of Contents
- What are the most common yearbook photo quality issues?
- What file and export rules should you follow for print?
- How do you proof yearbook photos before sending to the printer?
- What retouching policies should advisers adopt?
- How do production timelines affect reshoot and reprint decisions?
- How do you quickly diagnose a photo that "looks bad"?
- Key Takeaways
- The part most advisers learn the hard way
- Trailmarkyearbooks makes print-quality yearbooks easier for advisers
- Useful sources and references for yearbook advisers
What are the most common yearbook photo quality issues?
Most picture quality problems fall into a handful of categories, and each has a diagnostic fingerprint that tells you what went wrong before you decide how to fix it.
Low resolution and pixelation
A pixelated photo looks blocky when you zoom in, and the edges of faces or text appear stair-stepped rather than smooth. The root cause is almost always insufficient pixel dimensions relative to the final print size. At a standard 300 DPI, a 2×3-inch portrait requires at least 600×900 pixels. A photo pulled from a school website or a social-media profile rarely meets that threshold.
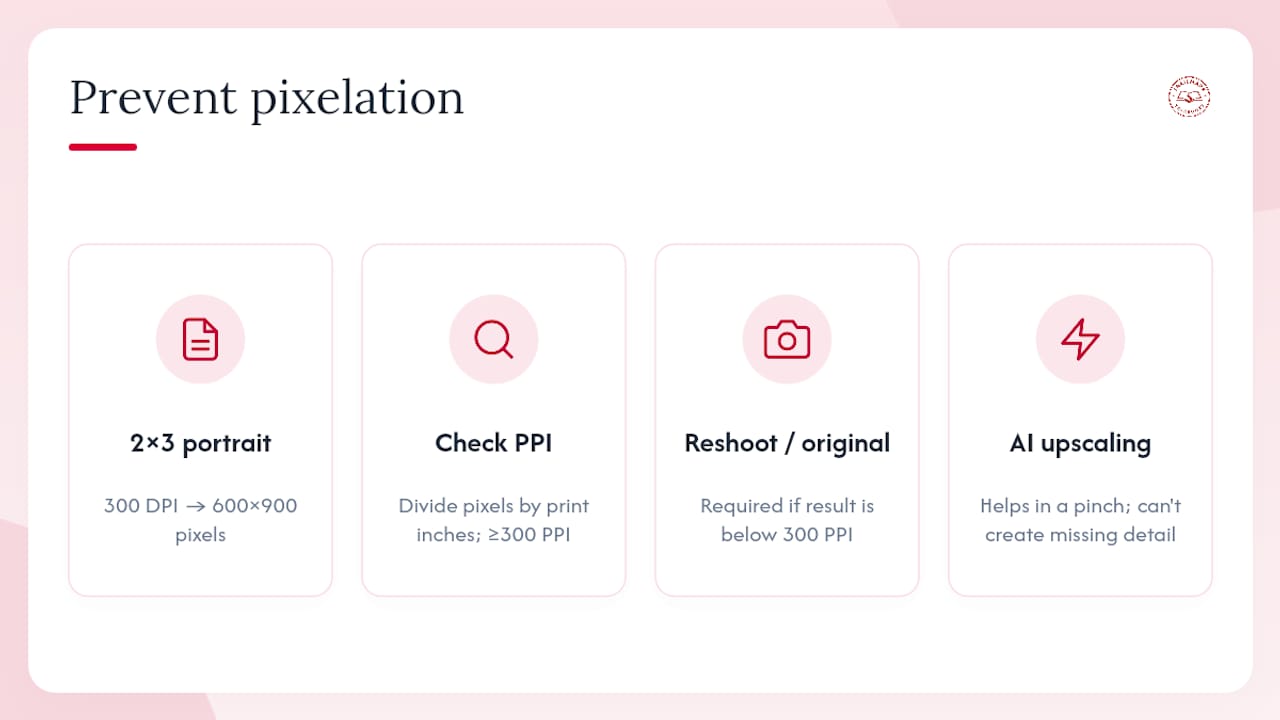
The first step is to check the actual pixel dimensions (not just the file size) and divide by the intended print dimensions. If the result is below 300 pixels per inch at final size, you need either a reshoot or the original high-resolution file. AI upscaling tools like Topaz Gigapixel AI can recover some detail in a pinch, but they can't manufacture information that was never captured. For senior portraits and full-page spreads, there's no substitute for the original.
Exposure and lighting problems
Overexposed images lose highlight detail permanently in JPEG files. If a student's forehead or the background is pure white with no texture, that data is gone. In RAW files, there's often one to two stops of recoverable highlight information, so always ask photographers to shoot RAW when possible.
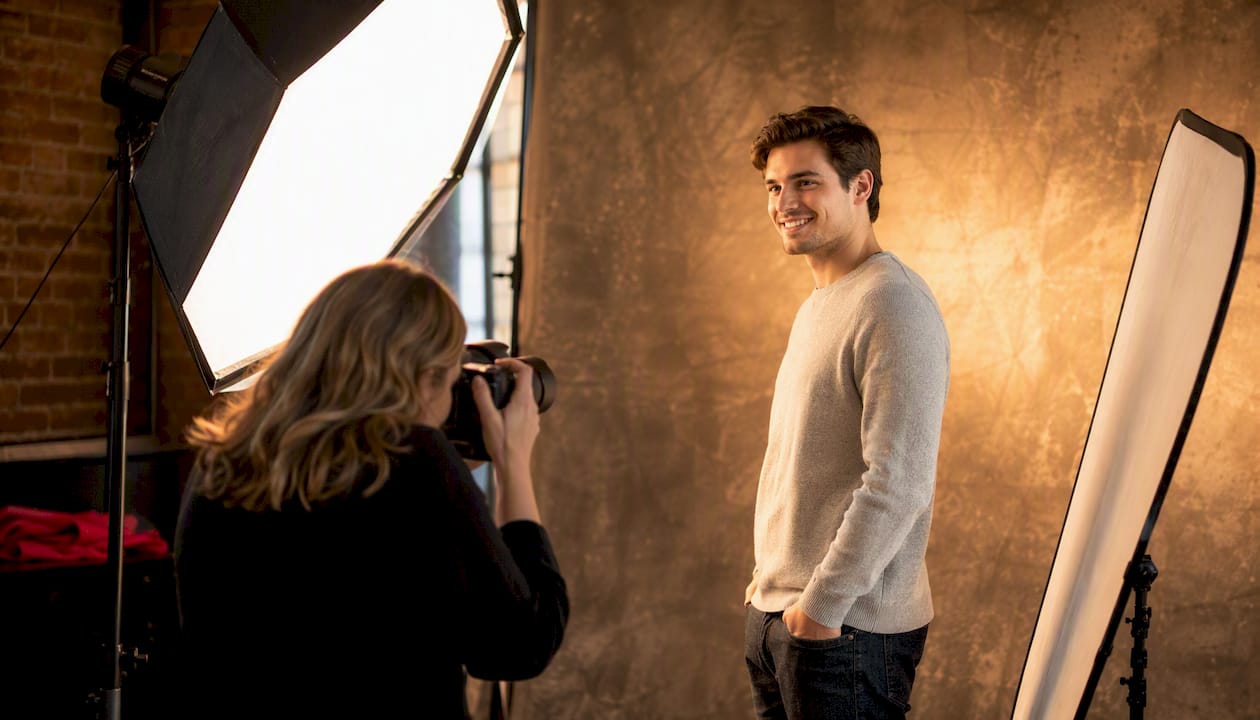
Underexposure is more forgiving in RAW but destructive in JPEG. Lifting shadows in a compressed JPEG introduces noise fast. For portrait sessions, the practical rule is to expose for the face, not the background. Harsh side lighting creates deep shadows that obscure facial features and look unflattering in print. A simple reflector or a fill light on the shadow side solves this at the shoot.
For advisers receiving already-shot images, the triage question is: does the face have detail? If the answer is no, request a reshoot. If the answer is yes but it's dark, try a curves or levels adjustment before deciding.
Color and white balance issues
White balance errors make skin tones look orange (tungsten light uncorrected), green (fluorescent), or blue (shade). These are fixable in editing software when the original file is available, but they're harder to correct in a heavily compressed JPEG without introducing color banding.
The deeper problem is that advisers often proof color on uncalibrated consumer monitors. Consumer displays with factory picture-mode presets can misrepresent brightness and color significantly, which means a photo that looks correct on screen may print with a visible color cast. Calibrating your proofing monitor with a hardware colorimeter (X-Rite i1Display Pro, Datacolor SpyderX) is the single most reliable way to catch color problems before they reach the printer.
For yearbook printing, sRGB is the safer color space for most workflows unless your printer explicitly supports and requests Adobe RGB. Embed the color profile in every exported file.
Noise and compression artifacts
High ISO noise shows up as grain and colored speckles, most visible in shadow areas and smooth skin tones. Mild noise responds well to Lightroom's built-in Denoise feature or Topaz DeNoise AI. Heavy noise, especially in a JPEG that's been re-exported multiple times, is harder to fix without losing facial detail.
Compression artifacts are a separate problem. They appear as blocky edges, banding in gradients, and a "watercolor" smearing effect around high-contrast edges. The cause is almost always a photo that's been uploaded to and downloaded from a social-media platform, which recompresses images aggressively. The fix is always the same: request the original camera file. There's no editing workaround that fully removes compression artifacts.
Scanning and scanned-photo problems
When a digital original isn't available, scanning a printed photo is the fallback. The most common scanning problems are moiré patterns (a wavy interference pattern caused by scanning halftone-printed images), color casts from aged photo paper, and loss of shadow detail.
Scan at a minimum of 600 DPI for standard portrait sizes, and 1200 DPI for small originals you plan to enlarge. Use a flatbed scanner with a glass platen rather than a sheet-fed scanner, which can introduce distortion. For moiré, most scanning software includes a descreening filter; apply it when scanning anything printed on a press (magazines, old yearbooks). If the original print is available, it's almost always better than a scan of a scan.
What file and export rules should you follow for print?
Getting the file right before it goes to the printer is where most yearbook image issues are actually solved. The technical decisions made at export determine whether a photo that looks fine on screen prints cleanly or comes out muddy, pixelated, or color-shifted.
Resolution: what 300 DPI actually means
The 300 DPI standard means 300 pixels for every inch of the final printed image. A 2×3-inch portrait therefore needs at least 600×900 pixels. A full-page spread at 8.5×11 inches needs at least 2,550×3,300 pixels. The table below gives common yearbook sizes and their minimum pixel requirements.
| Print size (inches) | Minimum pixels (300 DPI) | Recommended pixels |
|---|---|---|
| 2×3 (standard portrait) | 600×900 | 600×900 |
| 8.5×11 (full page) | 2,550×3,300 | — |
| 8.5×11 | 2,550×3,300 | — |
Printer spec callout: 300 DPI at final printed dimensions is the industry baseline for sharp photographic reproduction in offset and digital press printing. Submitting images below this threshold is the single most common cause of pixelated yearbook portraits.
Always supply original camera files or high-resolution exports, never screenshots. A screenshot from a school website or a photo downloaded from Instagram will almost never meet the 300 DPI threshold at portrait size.
Color space and ICC profiles
For most school yearbook workflows, sRGB is the correct color space. It's the default for most cameras, most editing software, and most digital presses. Adobe RGB has a wider gamut, but it only helps when your entire workflow, from camera to editing software to printer RIP, is color-managed end to end. If you're not sure your printer supports Adobe RGB, use sRGB and embed the profile.
Embedding the ICC profile in the exported file is not optional. A file without an embedded profile forces the printer's RIP software to make assumptions about the color space, which frequently results in a color shift. In Photoshop, embed the profile at export via "Save As" and check "Embed Color Profile." In Lightroom, select the color space in the Export dialog.
Preferred file formats and export settings
- TIFF (uncompressed or LZW): The best choice for final print files. No quality loss, preserves all color data, supports embedded ICC profiles. File sizes are large but that's the trade-off for lossless quality.
- JPEG (quality 10–12 in Photoshop, or "Maximum"): Acceptable for most yearbook printers when TIFF is not required. Use baseline (standard) JPEG, not progressive. Set quality to maximum and avoid re-saving the file multiple times.
- PNG: Acceptable for graphics and logos but not ideal for photographic portraits due to larger file sizes without quality advantages over TIFF.
- PDF: Often required for full-page layouts. Embed all images at 300 DPI and use PDF/X-1a or PDF/X-4 for press-ready output.
Export checklist before upload:
- Confirm pixel dimensions meet 300 DPI at final print size.
- Verify the color space is sRGB (or Adobe RGB if your printer requires it) and the ICC profile is embedded.
- Save as TIFF or maximum-quality JPEG; avoid progressive JPEG.
- Check the filename: use a consistent convention (e.g., LastName_FirstName_Grade.tif) with no spaces or special characters.
- Confirm bleed and safe-area margins: keep faces and critical content at least 0.125 inches inside the trim line.
- Open the final file at 100% zoom and inspect face detail, edges, and shadow areas before uploading.
- Strip unnecessary metadata (GPS data, personal device info) but retain color profile metadata.
Pro Tip: When you open a file at 100% zoom in Photoshop and the image looks sharp and detailed, it will almost certainly print well. If it looks soft or pixelated at 100%, it will print that way too. This one check catches more problems than any other step in the workflow.
How do you proof yearbook photos before sending to the printer?
A single proofing pass, done right, prevents the majority of late reprints. The key is building it into the schedule rather than treating it as an afterthought the week before the deadline.
The top-line rule: run every image through a structured proofing checklist before final art sign-off. Advisers who skip this step and rely on "it looked fine on my laptop" are the ones calling the printer in a panic two days before delivery.
Step-by-step proofing checklist
- Open every image at 100% zoom. Check face detail, eye sharpness, and shadow areas.
- Verify pixel dimensions: confirm the image meets 300 DPI at its placed print size.
- Check for directional blur, noise, or compression artifacts.
- Inspect the histogram: look for clipped highlights (spike at the right edge) or crushed shadows (spike at the left edge).
- Verify the color profile is embedded and matches the printer's required color space.
- Check crop and framing: confirm no heads are cut off and the subject has appropriate headroom.
- Verify bleed and safe-area compliance for any full-bleed images.
- Confirm the file format and naming convention match the printer's specifications.
- Check for any retouching that hasn't been documented or consented to.
- Sign off with a dated record: adviser name, date reviewed, and any flagged issues.
Handling emergency photos close to deadline
When a photo arrives in the final week, the decision framework is simple:
- Does it meet the 300 DPI threshold at final print size? If no, contact the family or photographer immediately for a higher-resolution file.
- Is there time for a reshoot? If yes, schedule it. If no, use a temporary placeholder and flag it for the printer.
- Is the quality acceptable for the student's dignity and the school's standards? If there's any doubt, escalate to the principal before accepting.
A photography intake checklist standardizes these decisions at the source and reduces the number of emergency situations that reach the proofing stage. The common yearbook design errors guide covers how weak intake processes create downstream layout problems that are expensive to fix.
What retouching policies should advisers adopt?
Retouching is where yearbook production carries the most ethical and reputational risk. The rule is short: keep edits minimal, document everything, and get written consent before anything that alters a student's appearance beyond basic technical corrections.
The core principle: Retouching that removes a medical feature, alters a student's identity, or eliminates a visible physical characteristic without explicit written consent is not a technical decision. It's an ethical one, and the consequences of getting it wrong are real and lasting.
The cases that make this concrete are not hypothetical. An Indiana teen's port scar was removed from her yearbook photo without consent, causing emotional harm and requiring corrective action after the family contacted the photography company. In a separate incident, a family demanded a recall of yearbooks after a poor-quality substitute photo was printed without approval. A New York Post report from 2005 documented lasting student embarrassment from a last-minute substitute portrait that went through without proper review. These aren't edge cases. They're the predictable result of weak policies.
Retouching policy checklist
Approved edits (no consent required):
- Correcting white balance and exposure
- Removing temporary blemishes (a pimple on photo day)
- Adjusting brightness, contrast, and sharpness for print quality
- Correcting red-eye
Edits requiring written consent:
- Removing scars, birthmarks, port scars, or any medical device
- Altering body shape or size
- Removing glasses, braces, or hearing aids
- Any edit that changes how a student is identifiably recognized
Forbidden edits (regardless of consent):
- Altering race, skin tone, or ethnicity
- Adding or removing clothing
- Compositing a student's face onto a different body
Sign-off steps:
- Adviser reviews the requested edit and categorizes it (approved / requires consent / forbidden).
- For consent-required edits, send a written request to the parent or guardian with a description of the proposed change.
- Parent or guardian signs and returns the consent form before any edit is made.
- Adviser documents the approval and retains it on file.
- For forbidden edits, decline in writing and offer an acceptable alternative (reshoot, different photo selection).
Consent form fields to include:
- Student name and grade
- Description of the proposed edit in plain language
- A checkbox: "I consent to the following edit: [description]"
- A checkbox: "I do not consent to any retouching beyond standard technical corrections"
- Parent/guardian signature and date
- Contact name and email for questions
Pro Tip: When a parent or student requests an edit that falls outside your approved list, use this script: "We want every student to look their best in the yearbook. Our policy allows us to correct lighting and exposure, and we're happy to do that. For changes beyond that, we'd need a signed consent form describing exactly what's requested. Would you like me to send that form?" This keeps the conversation professional, gives the family a path forward, and protects the school.
For a broader framework on consent and signoff procedures, the school yearbook policy best practices guide covers the full policy structure advisers should have in place.
How do production timelines affect reshoot and reprint decisions?
Every fix costs more the later it happens. A reshoot in week two of production costs an hour of a photographer's time. The same reshoot in week ten costs that plus a designer's time to re-layout the spread, a potential rush fee from the printer, and possibly a delayed delivery date.
The decision isn't just about quality. It's about where you are in the timeline and what each option actually costs.
Reshoot vs. repair vs. accept
| Factor | Reshoot | Repair (edit) | Accept |
|---|---|---|---|
| Time to fix | 1–5 days (schedule dependent) | Hours to 1 day | None |
| Expected quality | Full quality restored | Partial improvement | As-is |
| Likely cost | Photographer time + re-layout | Designer time | None |
| When to choose | Blur, severe pixelation, clipped highlights, consent issues | Minor exposure, white balance, mild noise | Minor imperfections, late deadline, no reshoot possible |
A few practical rules for minimizing cost:
- Batch reshoots. If five students need new photos, schedule one session rather than five separate ones.
- For emergency portrait sessions close to deadline, use a simple, consistent setup (neutral background, one softbox, fixed focal length) so images match the rest of the book.
- Use high-quality scans only when the original digital file is genuinely unavailable, not as a shortcut.
- Never accept a low-resolution image for a senior full-page spread unless you can confirm it meets 300 DPI at final print size. The student will see that page for the rest of their life.
The common yearbook timeline delays guide covers the most frequent bottlenecks and how to build buffer time into the schedule before they become emergencies.
Last-minute photo substitutions carry their own specific risk. The New York Post case referenced earlier is a reminder that a quick fix without proper review can cause more harm than a placeholder. Any substitute photo used after the standard deadline should require explicit adviser approval and a written note in the production file.
How do you quickly diagnose a photo that "looks bad"?
Open the file at 100% zoom. That's the starting point for every diagnosis. What you see at 100% is what will print.
Decision flow
- Blur + low resolution + clipped highlights: Reshoot. No editing path recovers all three.
- Minor exposure or white balance issue + original file available: Repair and re-export.
- Compression artifacts + original file unavailable: Request original from photographer or family. If unavailable, escalate to adviser for accept/reject decision.
- Mild noise + acceptable sharpness: Apply denoise tool, re-export at maximum quality, re-proof.
- Missing color profile: Assign sRGB, re-export, re-proof.
Quick fixes acceptable for last-minute cases:
- White balance correction in Lightroom or Camera Raw
- Exposure and shadow recovery from a RAW file
- Mild noise reduction
- Cropping to correct minor framing issues (not severe head cuts)
Escalate to photographer or family for reshoot when:
- The image is blurry and the subject is the face
- Pixel dimensions are below 300 DPI at final print size and no original is available
- Highlights are clipped on the face and the file is a JPEG (no recovery possible)
- The photo was taken in conditions that can't be corrected (harsh direct flash, extreme backlight)
Key Takeaways
Most yearbook photo quality problems are preventable when advisers collect original files at intake, proof every image at 100% zoom, and follow the printer's 300 DPI and ICC profile requirements from the start.
| Point | Details |
|---|---|
| Collect originals, not downloads | Social-media and website downloads are almost always recompressed and below 300 DPI at portrait size. |
| Proof every image at 100% zoom | What looks sharp on screen can be visibly pixelated in print; 100% zoom is the only reliable check. |
| Follow the 300 DPI rule | Every image must meet 300 pixels per inch at its final printed dimensions before upload. |
| Adopt a written retouching policy | Any edit beyond basic technical corrections requires documented consent; unauthorized edits have caused real harm and recall demands. |
| Trailmarkyearbooks supports print-ready workflows | Trailmarkyearbooks builds its production process around standard print specs, offers free design assistance, and provides physical sample requests so advisers can verify print quality before the full run. |
The part most advisers learn the hard way
The most repeated failure in yearbook production isn't a technical one. It's a process one. Advisers who struggle with yearbook photo flaws year after year almost always share the same three habits: they collect photos too late to fix problems, they don't have a written standard for what "acceptable quality" means, and they proof on whatever screen happens to be nearby.
The technical rules in this article are not complicated. Three hundred DPI, sRGB, original files, 100% zoom proofing. Any adviser can learn those in an afternoon. What takes longer to build is the intake process that enforces them before photos reach the layout stage, the retouching policy that protects students before something goes wrong, and the proofing workflow that catches problems before the printer does.
Trailmarkyearbooks has worked with schools long enough to know that the advisers who have the smoothest production seasons are the ones who treat photo quality as an intake problem, not a deadline problem. The yearbook photography checklist for school coordinators is a practical starting point for building that intake standard. If you want to confirm what your photos will actually look like in print, request a physical sample before you commit to a full run.
Trailmarkyearbooks makes print-quality yearbooks easier for advisers
Fixing poor yearbook images at the last minute is stressful and expensive. Trailmarkyearbooks is built to reduce that pressure from the start. With a 2–3 week turnaround, all-inclusive transparent pricing, and free design assistance, advisers get a production partner that works with their schedule rather than against it. The team supports flexible design options through Canva, Adobe InDesign, and a proprietary online creator, and every order includes hands-on support from a dedicated adviser with real production experience.

Trailmarkyearbooks follows documented sign-off procedures and production-friendly export standards, so the files you submit are handled consistently from intake to press. If you want to see exactly how your photos will look in print before committing to a full order, request a physical sample and compare it against your proofing display. When you're ready to move forward, the full production options are available with instant all-inclusive pricing, no sales pitch, and no hidden fees.
Useful sources and references for yearbook advisers
These are the sources cited throughout this article, organized by how you're most likely to use them.
For diagnosing and fixing common picture quality problems:
- How to Fix a Bad Quality Picture: 5 Simple Fixes That Actually Work
- Why Your Photos Are Blurry: 7 Causes and Fixes | Fstoppers
- TV settings for the ultimate picture quality TV calibration a3400045646
- Indiana teen shares message of body positivity after her yearbook photo was edited
- Mom Demands Recall of Daughter's School Yearbook — ABC News
- Yearbook Photography Checklist for School Coordinators
- Common Yearbook Design Errors: 2026 Adviser Guide
For proofing and display calibration:
For retouching policy and real-world incident context:
- Indiana Teen Shares Message of Body Positivity After Her Yearbook Photo Was Edited — WRTV. The clearest documented case of unauthorized retouching causing emotional harm.
- Cheap 'Shot' Hits Kid Hard — New York Post. Documents community backlash from a last-minute low-quality photo substitution.
Trailmarkyearbooks adviser resources:
- Yearbook Photography Checklist for School Coordinators — Standardizes camera settings, framing, and file naming at intake.
- Common Yearbook Design Errors: 2026 Adviser Guide — Covers design and photo-quality mistakes with corrective actions.
- Request a Physical Sample — Verify print quality before your full order.