

DPI, or dots per inch, measures the number of ink dots a printer places within one square inch of paper, directly defining the sharpness and detail of every photo in your yearbook. Understanding what does dpi mean yearbook printing is the difference between a spread that looks crisp and professional and one that looks blurry and pixelated. The industry standard for quality print reproduction is 300 PPI, a benchmark derived from commercial halftone screening at 150 LPI. Yearbook advisers and graphic designers who understand this standard avoid the most common and costly production mistakes before files ever reach the press.
What does DPI mean for yearbook printing quality?
DPI is a hardware property. It describes how many ink droplets a printer can physically place within one inch of paper. Professional offset presses often operate at 2,400 DPI at the hardware level, yet they require source image files at 300 PPI to render sharp halftone patterns. That gap between printer capability and file requirement is where most confusion starts.
PPI, or pixels per inch, is the number you actually control as a designer. It describes the pixel density of your digital image at a specific physical print size. When you tell a colleague to "submit photos at 300 DPI," you are technically asking for 300 PPI at the intended print dimensions. The industry shorthand "300 DPI" is technically imprecise but practically useful. It communicates the expectation for a print-ready file without requiring every contributor to understand halftone physics.
The relationship between pixel count and print size is what makes this concrete:
- A 3,000 x 2,000 pixel photo printed at 10 x 6.67 inches delivers exactly 300 PPI.
- Enlarge that same photo to 15 x 10 inches without adding pixels, and PPI drops to 200. Sharpness drops with it.
- Shrink it to 5 x 3.33 inches, and PPI rises to 600. The image looks sharp, but the file carries more data than the press can use.
The physical print size on your yearbook page determines effective PPI. Check effective PPI in your design software rather than relying on the metadata embedded in the file. Metadata can lie. Your layout cannot.
Pro Tip: When you place a photo in Adobe InDesign or Canva, check the effective PPI in the image properties panel. If it reads below 250 PPI at the placed size, the photo will likely trigger a DPI warning at export.
How DPI affects yearbook print quality and file preparation
Getting resolution right is not just about sharpness. It affects your entire production workflow, from file size to proofing speed to press stability.
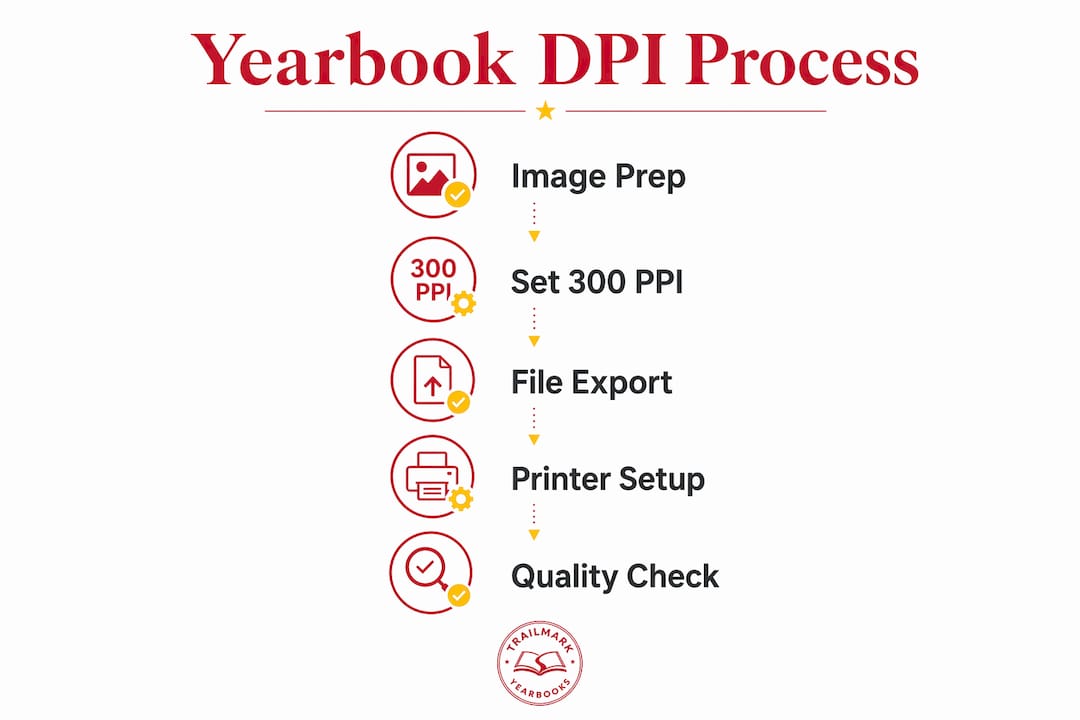
The 300 PPI standard for yearbook images is not arbitrary. It comes directly from the math of halftone screen ruling: commercial printing typically uses a 150 LPI screen, and the optimal image resolution is 1.5 to 2 times that value, landing squarely at 225–300 PPI. Matching your image PPI to 300 gives the press exactly what it needs to reproduce fine detail, skin tones, and text overlays cleanly.
Going below 300 PPI causes visible problems. Going above it creates invisible ones.
- Below 200 PPI: Photos appear pixelated or blurry in print. Group shots lose individual faces. Text embedded in graphics becomes jagged. These issues are visible to anyone who opens the finished yearbook.
- At 300 PPI: The human eye resolves detail at approximately 300 DPI at normal reading distance. This is the sweet spot for halftone reproduction, and it is where your files should land.
- Above 400 PPI: File sizes grow dramatically. Processing slows down. Yearbook design software can crash or stall during export. The press gains no visible quality improvement because the human eye cannot perceive the added detail.
Increasing DPI beyond 300 does not improve visual quality. It increases file size and processing time, which can destabilize proofing software and slow your entire production timeline. Resolution is part of an end-to-end workflow, and over-specifying it creates inefficiencies without any perceptible benefit on the printed page.
Pro Tip: Export all yearbook images at exactly 300 PPI with the physical print dimensions set correctly. In Adobe Lightroom, set both the long edge dimension and the PPI together in the export dialog. The software calculates the correct pixel count automatically.
For full-color spreads, understanding how color printing interacts with resolution helps you make smarter decisions about image placement and sizing before you submit files.
Common mistakes and misconceptions about DPI in yearbook printing
Most resolution errors in yearbook production come from misreading what software is actually reporting. These are the mistakes that show up most often on print proofs.
- Trusting metadata over effective PPI. A photo can have "300 DPI" embedded in its file metadata and still print blurry. If the pixel dimensions are too small for the placed size, the effective PPI is low regardless of what the metadata says. Always verify effective PPI at the actual print size in your layout.
- Uploading low-resolution photos labeled as 300 DPI. A 600 x 400 pixel image with 300 DPI metadata is only 2 x 1.33 inches at full resolution. Place it at 4 x 2.67 inches and effective PPI drops to 150. The label means nothing without the pixel count to back it up.
- Ignoring print dimensions when scaling images. Stretching a photo to fill a full-page bleed without checking effective PPI is one of the most common causes of DPI warnings on print proofs. The warning tells you the image is not high enough resolution for its printed size.
- Assuming screen quality equals print quality. A photo that looks sharp on a monitor at 72 PPI can look terrible in print. Screens and printers work differently. Screen resolution is not a reliable predictor of print sharpness.
- Rescaling images in design software to "fix" resolution. Enlarging a low-resolution image in InDesign or Canva does not add pixels. It just spreads existing pixels over a larger area, which makes pixelation worse, not better.
A useful resource for school photographers submitting images is this yearbook photography checklist, which covers resolution requirements alongside other submission standards.
How to check and set the correct DPI for yearbook photos
Verifying and setting the right resolution is a repeatable process. Follow these steps before submitting any file to print.
- Determine your target print size. Measure the exact dimensions of the image placement on your yearbook page, including any bleed area. A portrait photo placed at 3.5 x 4.5 inches needs a minimum of 1,050 x 1,350 pixels at 300 PPI.
- Calculate the required pixel dimensions. Multiply the print width in inches by 300 to get the minimum pixel width. Do the same for height. A 5 x 7 inch photo requires at least 1,500 x 2,100 pixels.
- Check effective PPI in your design software. In Adobe InDesign, right-click the placed image and select "Image Info" or check the Links panel. The effective PPI shown there reflects the actual print size, not the original file metadata.
- Export with both dimensions and PPI set correctly. Exporting with correct settings means setting the physical print dimensions and the PPI together in the export dialog. Software like Lightroom uses both inputs to calculate the correct pixel output.
- Run a preflight check before submission. Most professional design applications include a preflight or export check that flags images below the resolution threshold. Run it on every file before sending to your printer.
| Page element | Minimum PPI | Notes |
|---|---|---|
| Full-page photo | 300 PPI | Check effective PPI at bleed size |
| Half-page photo | 300 PPI | Verify after scaling in layout |
| Small portrait (under 2 inches) | 250–300 PPI | Slight flexibility at small sizes |
| Background texture or graphic | 150–200 PPI | Lower threshold acceptable for large fills |
| Text-based graphic | 300 PPI | Sharp edges require full resolution |
Pro Tip: For school photos submitted by parents or staff, set a minimum pixel dimension requirement rather than asking for "300 DPI." Requesting photos at least 1,800 x 2,400 pixels gives you flexibility to place them at various sizes while staying above 300 PPI. Professional school photographers, like those at Richard Jarmy Photography, deliver files sized correctly for print from the start.
Understanding how paper stock choices interact with print resolution also helps you set realistic expectations for image sharpness across different yearbook formats.
Key takeaways
Print resolution in yearbook production is defined by effective PPI at the actual print size, not by file metadata, and 300 PPI is the non-negotiable standard for sharp, professional results.
| Point | Details |
|---|---|
| DPI vs. PPI | DPI is a printer hardware property; PPI is what you set in your image file and layout. |
| 300 PPI standard | Match image PPI to 300 at the intended print size for optimal halftone reproduction. |
| Effective PPI matters | Always verify effective PPI in your layout software, not just the file metadata. |
| Avoid over-specifying | Files above 400 PPI increase size and slow proofing without improving visible print quality. |
| Pixel math is the fix | Multiply your print dimension in inches by 300 to find the minimum pixel count required. |
The resolution mistake I see on almost every first yearbook
After working with yearbook production files across dozens of school projects, the single most common problem is not low-resolution photos. It is advisers and designers who trust the wrong number. They see "300 DPI" in the file info panel, assume the image is print-ready, and move on. Then the proof comes back blurry.
The metadata in a photo file is just a label. It does not change the pixel count. A 900 x 600 pixel image with a "300 DPI" tag is only print-ready at 3 x 2 inches. Place it larger and you have a problem, regardless of what the tag says. I have seen this exact scenario cause reprints, delays, and real frustration for advisers who did everything they thought was right.
My advice: stop thinking in DPI and start thinking in pixels. Ask every contributor for the pixel dimensions of their photos. Set a minimum. Post it clearly in your contributor guidelines. When you know a photo is 2,400 x 3,000 pixels, you know exactly how large you can print it at 300 PPI without doing any guesswork.
The other thing I would tell every yearbook adviser is to run a preflight check as a non-negotiable final step, not an afterthought. Design software flags low-resolution images automatically. Use that feature. It takes two minutes and it catches the errors that cost hours to fix after a proof comes back wrong.
— Jace
Trailmarkyearbooks and print quality you can count on
Getting DPI right is one part of producing a yearbook you are proud to hand out. Trailmarkyearbooks brings 50+ years of combined experience to every project, with a production process built around high-resolution print standards from file submission to finished book.

If you want to see exactly how resolution translates to print quality before you commit, request a printed sample and compare it against your expectations. Trailmarkyearbooks also offers free design assistance and flexible tools including Canva, InDesign, and an online creator, so your files are set up correctly from the start. Browse the full range of yearbook production options and get instant all-inclusive pricing with no signup required.
FAQ
What is the correct DPI for yearbook photos?
The correct setting is 300 PPI at the intended print size. This matches the halftone screen ruling used in commercial offset printing and delivers sharp, detailed results.
What is the difference between DPI and PPI in printing?
DPI describes how many ink dots a printer places per inch (a hardware property). PPI describes the pixel density of your image file at a specific print size. When you set an image to "300 DPI" in design software, you are setting its PPI.
Why does my photo look sharp on screen but blurry in print?
Screens display images at 72–96 PPI, which looks sharp on a monitor. Print requires 300 PPI at the physical print size. A photo that fills your screen at 72 PPI does not have enough pixels to print clearly at the same dimensions.
What happens if I submit yearbook images above 300 PPI?
Higher PPI above 300 does not improve visible print quality. It increases file size, slows export and proofing, and can cause design software to crash without any benefit to the finished yearbook.
How do I calculate the pixel dimensions I need for a yearbook photo?
Multiply the print width in inches by 300 to get the minimum pixel width, and do the same for height. A 4 x 6 inch photo requires at least 1,200 x 1,800 pixels to print at 300 PPI.