The yearbook proofing process is a multi-stage, systematic review that catches every name error, caption mismatch, and layout flaw before ink hits paper. Most printed yearbook mistakes are permanent. A misspelled student name or swapped photo caption cannot be corrected after the books ship. The five critical review stages in a complete proofing workflow distribute accountability across your team so no single person carries the full burden of catching every error. This guide walks you through each stage, the right tools, and the most common pitfalls to avoid before your final submission to the printer.
What are the essential stages of the yearbook proofing process?
A complete yearbook editing process runs through five distinct stages. Each stage targets a different category of error. Relying on one person to catch everything is the fastest path to a mistake that ends up in 400 printed copies.
Stage 1: Section Editor Review
Section editors own the first pass. Their job is to verify every name, caption, and photo against official school rosters before anything moves forward. This is where you catch the most damaging errors: a student listed under the wrong grade, a photo paired with the wrong name, or a club caption that references last year's event. Section editors should also confirm page numbers, headline accuracy, and that every spread is complete.
Stage 2: Copy Editor Detail Review

Once content accuracy is confirmed, a copy editor reviews every line for spelling, grammar, and style consistency. This person is not checking whether the caption matches the photo. They are checking whether "sophomore" is capitalized consistently, whether punctuation follows your style guide, and whether any sentence reads awkwardly. Tools like Grammarly or the Hemingway Editor help flag passive voice and run-on sentences, but a human copy editor still needs to make the final call on yearbook-specific style choices.
Stage 3: Fresh Eyes Review
A reviewer who has not worked on the section reads it cold. Fresh readers catch errors that familiarity blinds regular editors to. This person might be another student editor, a parent volunteer, or a teacher not involved in yearbook production. Their distance from the material is the point.
Stage 4: Adviser Final Approval
The adviser's role at this stage is not to re-read for typos. The adviser applies adult judgment to content appropriateness, school policy compliance, and whether any spread could cause harm or embarrassment. This is a policy and ethics review, not a grammar check.
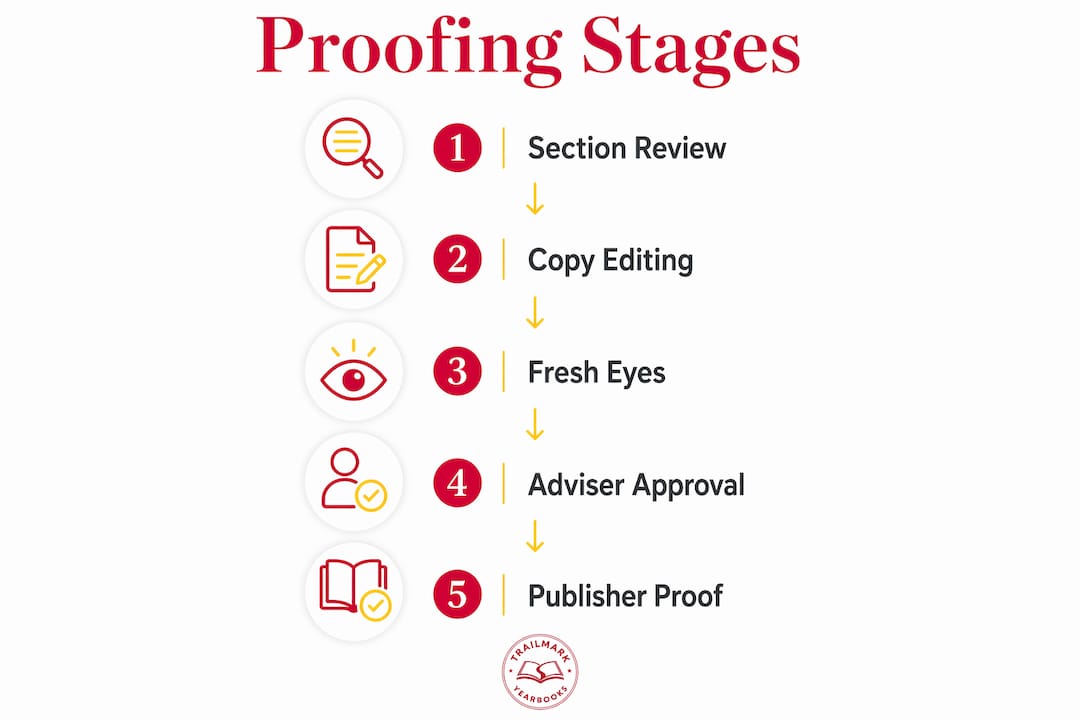
Stage 5: Publisher Page Proof Review
The publisher sends back a page proof showing exactly how the book will print. This is your last chance to catch production issues. Physical printed proofs reveal color shifts, image quality degradation, and pagination errors that look fine on a monitor. Approve nothing based on a screen preview alone.
Pro Tip: Assign each stage a named reviewer and a hard deadline. A yearbook deadline management checklist keeps every stage on track and prevents the final approval from becoming a last-minute scramble.
How to use checklists and tools effectively during proofreading
A yearbook proofreading checklist is not optional. It is the difference between a systematic review and a hopeful skim. Every reviewer at every stage needs a written list of exactly what they are checking.
A strong checklist for section editors covers:
- Names: Every student name verified against the official school roster, including correct spelling of first and last names
- Captions: Each caption matched to its corresponding photo, confirmed accurate and complete
- Page numbers: Sequential, no gaps, no duplicates
- Headlines: Accurate, consistent capitalization, no factual errors
- Photo placement: No repeated photos, no missing students from group shots
- Formatting: Consistent font sizes, color usage, and margin spacing across the section
For name verification specifically, pull the official school enrollment list from your district's student information system. Do not rely on last year's roster or a class list a teacher emailed in September. Student names change, and spellings matter.
Automated indexing tools in yearbook software save hours and reduce errors compared to manual indexing. Software like Yearbook 360 continuously updates the index as photos and names are tagged throughout production. That means your index reflects every change made during proofing, not just the state of the book at one point in time.
For grammar and readability, Grammarly and ProWritingAid both integrate with common word processors and catch errors that tired eyes miss after hours of reviewing. Use them as a first pass, not a final answer.
Pro Tip: Log every review with a timestamp and the reviewer's name. A shared Google Sheet or a note inside your yearbook software works fine. When a question comes up about whether a change was made, you have a record.
Common proofing challenges and how to avoid costly mistakes
The most common proofreading oversights in yearbook production fall into four categories: misspelled names, swapped captions, missing or duplicate pages, and formatting inconsistencies. These errors appear despite multiple reviews because each one tends to hide in a different part of the workflow.
Here is why each error type survives early reviews and how to stop it:
- Misspelled names survive because reviewers assume the name is correct if it looks familiar. Cross-checking against the official roster at Stage 1 is the only reliable fix. Do not trust memory or a previous draft.
- Swapped captions happen when photos are moved during layout revisions and captions do not follow. Lock captions to their photos in your design software before the Stage 1 review begins.
- Missing or duplicate pages occur during file assembly, especially when multiple editors work on different sections and merge files at the end. A full page count check at Stage 4 and again at Stage 5 catches this.
- Formatting inconsistencies accumulate when different editors apply styles manually instead of using a shared style sheet. Set your fonts, colors, and spacing in a master style guide before production starts, and enforce it at Stage 2.
The most expensive yearbook mistake is the one that makes it to print. A student whose name is misspelled in the index, a senior photo captioned with the wrong name, or a missing page in the sports section cannot be fixed after delivery. Systematic proofing is not extra work. It is the work.
Scheduling clear deadlines and assigning roles to specific team members reduces the chance that any stage gets skipped under deadline pressure. When everyone knows their job and their due date, errors get caught before they compound.
What does final approval and publisher submission involve?
Final approval is the last gate before your yearbook goes to print. Getting it right requires a deliberate, structured review rather than a quick scan.
Follow these steps in order:
- Review the physical page proof. Request a printed proof from your publisher before approving. Verifying pagination and print specifications in print catches issues that digital previews hide, including color accuracy, image sharpness, and binding alignment.
- Check photo reproduction quality. Low-resolution images that look acceptable on screen often print blurry or pixelated. Flag any image that looks soft or grainy in the physical proof and request a replacement before approval.
- Confirm page order and binding specs. Count every page. Verify the table of contents matches the actual page locations. Confirm that the cover, spine text, and endpapers are correct.
- Communicate changes in writing. Send all correction requests to your publisher in a single, numbered list. Verbal change requests get lost. Written lists create a record and reduce the chance of a correction being missed or misapplied.
- Use your publisher's file review service. Free file review services help catch technical print issues before final submission, reducing production delays. Most reputable yearbook printers offer this at no charge.
Pro Tip: Build your proofing timeline backward from your print deadline. If your printer needs files by March 15, your adviser approval should be complete by March 8, your publisher proof review by March 1, and your fresh eyes review by February 22. Working backward forces realistic scheduling.
| Review Stage | Who Completes It | Primary Focus |
|---|---|---|
| Section Editor Review | Student section editors | Names, captions, photos, page numbers |
| Copy Editor Review | Designated copy editor | Spelling, grammar, style consistency |
| Fresh Eyes Review | Outside reviewer | Overlooked errors, readability |
| Adviser Final Approval | Yearbook adviser | Policy, content appropriateness |
| Publisher Proof Review | Adviser and publisher | Print quality, color, pagination |
Key takeaways
A complete yearbook proofing workflow requires five distinct review stages, each targeting a different error type, to prevent permanent mistakes from reaching the printed book.
| Point | Details |
|---|---|
| Five stages catch different errors | Each review stage targets a specific error type that other stages are likely to miss. |
| Official rosters prevent name errors | Cross-check every student name against the school's official enrollment records at Stage 1. |
| Physical proofs reveal print issues | Approve publisher page proofs only after reviewing a printed copy, not a screen preview. |
| Checklists make reviews systematic | A written checklist for each stage turns a hopeful skim into a reliable quality check. |
| Written deadlines protect timelines | Assign named reviewers and hard deadlines to every stage to prevent last-minute bottlenecks. |
What i've learned after watching too many yearbooks go to print too fast
Most proofing problems I see come from the same source: the adviser tries to do too much alone. The multi-stage process exists precisely because a chain of accountability catches distinct error types that a single reviewer cannot reliably catch across an entire book. When the adviser becomes the only proofer, they are reading for names, grammar, policy, and print quality simultaneously. Nobody does all four well at once.
The other pattern I see is skipping the physical proof review. Advisers approve the digital PDF, the books arrive, and a color that looked navy blue on screen printed as purple. Or a senior photo that looked sharp in the layout file printed soft because the original file was 72 DPI instead of 300. Those are not printer errors. They are approval errors that a printed proof would have caught.
My honest advice: treat the yearbook adviser responsibilities at each stage as non-negotiable. Build your team's roles into the process from the start of the school year, not the week before the deadline. The schools that produce clean, error-free yearbooks are not the ones with the most talented editors. They are the ones with the most organized process.
— Jace
How Trailmarkyearbooks helps you proof and print with confidence
Trailmarkyearbooks is built for advisers who want fewer surprises and more support at every stage of production. The team behind Trailmarkyearbooks brings 50-plus years of combined experience to every school they work with, and that shows up in the details.

You can download ready-to-use proofreading checklists and adviser PDFs that walk your team through every review stage. Before you commit to a final order, request a printed sample to see exactly how your photos, colors, and layouts reproduce in print. The Trailmarkyearbooks support team is available to answer questions, review files, and help you hit your deadline without the last-minute panic. No sales pitch, no hidden fees, just straightforward help from people who know yearbooks.
FAQ
What is the yearbook proofing process?
The yearbook proofing process is a structured, multi-stage review system that checks every name, caption, photo, layout, and print specification before a yearbook goes to press. It typically includes five stages: section editor review, copy editor review, fresh eyes review, adviser final approval, and publisher page proof review.
How many people should proof a yearbook?
At minimum, three to four different reviewers should proof a yearbook across the five stages. Using multiple reviewers prevents familiarity blindness and distributes accountability so each error type gets caught by the reviewer best positioned to spot it.
What are the most common yearbook mistakes?
The most common yearbook errors include misspelled student names, swapped photo captions, missing or duplicate pages, and formatting inconsistencies. Cross-checking names against official school rosters and locking captions to photos during layout prevents most of these.
Should i approve a yearbook proof digitally or in print?
Always review a physical printed proof before final approval. Color shifts and image quality issues are often invisible on screen but appear clearly in print. Digital approval alone is the leading cause of color and resolution surprises after delivery.
When should the proofing process start?
Proofing should begin as each section is completed, not after the entire book is assembled. Building your review timeline backward from the printer's deadline, with at least two weeks of buffer before submission, gives every stage enough time to catch and correct errors without rushing.