

To upload to your yearbook project's snap uploader, log in to your project dashboard, select the uploader tool, choose the original high-resolution JPEG file (not a screenshot or gallery link), attach the required student metadata, and hit submit.
- Look for on-screen confirmation or a confirmation email with the filename listed.
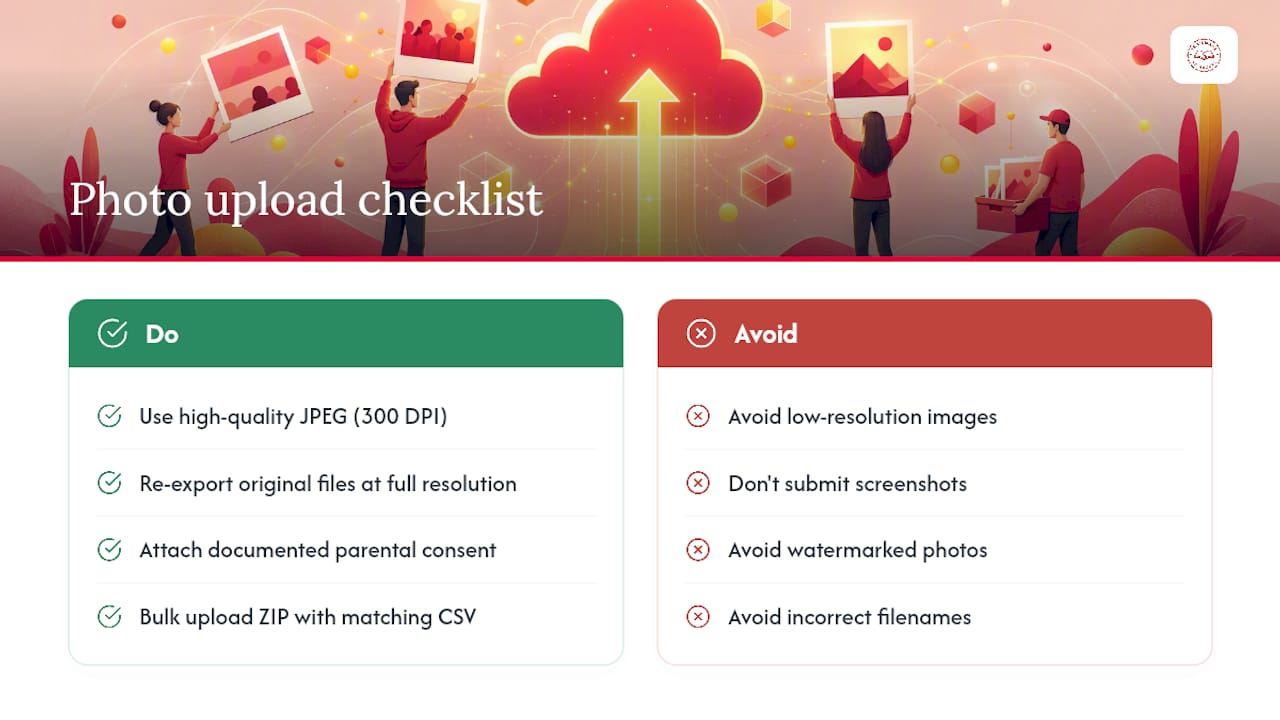
- Files should be JPEG at 300 DPI or whatever resolution your specific platform requests.
- Every upload needs parental or guardian consent attached before it counts as complete.
Key Takeaways
Successful yearbook photo uploads depend on correct file specs, consistent naming, documented consent, and verified confirmation before the deadline closes.
| Point | Details |
|---|---|
| Use original high-res JPEGs | Require 300 DPI files straight from the photographer, never screenshots or gallery links. |
| Standardize filenames | Use a pattern like Last_First_Grade_Homeroom.jpg to speed sorting and reduce mismatches. |
| Document consent every time | Attach signed or digital consent to every photo before it counts as submitted. |
| Test bulk imports first | Run 10 to 20 records through your CSV mapping before uploading the full batch. |
| Get hands-on support | Trailmarkyearbooks offers CSV mapping help, quality checks, and a dedicated adviser for uploads. |
Templates and Resources for Faster Uploads
Grab a photography checklist to share with staff and photographers before collection starts. Review common photo quality issues so your team can catch problems before submission, not after rejection.
- Example CSV template with matching filename patterns
- Sample parental consent wording
- Photo quality troubleshooting guide
Need the exact templates TrailMark uses with partner schools? Request a sample and ask for the upload starter kit.
Table of Contents
- How Do You Upload a Single Student Photo?
- What File Specs and Naming Rules Should You Require?
- How Should You Collect Photos and Handle Parental Consent?
- How Do You Handle Bulk Uploads With CSV or ZIP Files?
- How Do You Verify Uploads and Fix Common Errors?
- When Are Yearbook Photo Deadlines, and What Happens Next?
- How Does TrailMark Yearbooks Support Photo Uploads?
- Want Uploads Off Your Plate Entirely?
- Frequently Asked Questions
- Sources
How Do You Upload a Single Student Photo?
Most yearbook platforms make single uploads simple once you know the sequence. Start at your project's login page or the direct snap uploader link provided by your yearbook company. You'll usually find this URL in your welcome email or pinned inside your adviser dashboard.
- Log in and locate the "Upload Photos" or "Snap Uploader" section on your dashboard.
- Select the photo file from your device, a shared drive, or cloud storage.
- Fill in the required metadata: student name, grade, homeroom or section, and photo ID if your school uses photographer numbering.
- Check any consent flag or permission box the platform requires before submission.
- Click upload or submit, then watch for a progress bar or thumbnail preview.
A green checkmark or a thumbnail with no error icon usually means the file processed correctly. If the platform shows a spinning icon for more than a minute or two on a normal-sized JPEG, something is wrong, often a file that's too large or a browser hiccup.
Pro Tip: Use the platform's built-in crop or preview tool sparingly. If you crop the working copy, keep the original file untouched on your computer so you can re-upload it if a replacement is ever needed.
Before you send bulk upload instructions to parents or students, run through this short checklist yourself:
- Confirm the uploader link works from a personal (non-school) device.
- Test with one sample photo to see exactly what confirmation looks like.
- Note any file size caps so you can warn families ahead of time.
What File Specs and Naming Rules Should You Require?
Most publishers ask for high-quality JPEG files at a minimum of 300 DPI, sometimes with specific pixel dimensions attached. Specs vary by publisher, so always check your project's stated requirements before setting your own rules for staff and families.
Consistent filenames save real time during layout. A pattern like Last_First_Grade_Homeroom.jpg (example: Garcia_Maya_5_Rm12.jpg) lets your team sort and cross-check hundreds of files without opening each one.
Metadata fields typically requested at upload include:
- Student's full first and last name
- Grade level
- Homeroom or section
- Photographer-assigned photo ID, if your school uses one
- Photographer credit, when required by contract
Pro Tip: Always request the original photographer file, never a screenshot or a link to an online proofing gallery. Screenshots strip resolution and gallery links often carry watermarks, both common reasons uploads get bounced back.
How Should You Collect Photos and Handle Parental Consent?
You've got several collection paths: direct upload by parents or students, teacher-collected batches, a secure guest upload URL for classroom drop-off, or email submission if your platform requires it. A guest upload link that tags candid photos by event or classroom keeps large collection efforts organized without extra software.
With every photo, collect:
- Signed or digitally checked consent
- Correct spelling of the student's name
- Grade level and, for candids, the event or date
Write a short, plain-language consent notice so families know exactly what to submit and what to skip (no screenshots, no group photos without every child's consent on file). District policy often governs this more strictly than your school's own preference, so when in doubt, check with your administration or legal counsel before finalizing a workflow.
Pro Tip: Build a standard consent script with a checkbox families tap during upload. Adviser-tested simple consent language cuts down on incomplete submissions dramatically compared to a vague "permission required" note.

How Do You Handle Bulk Uploads With CSV or ZIP Files?
Bulk uploads generally work one of three ways: a ZIP of images paired with a CSV mapping file, a bulk CSV import keyed to photographer IDs, or a platform-specific bulk uploader tool. Whichever method your yearbook company uses, the mapping file is what turns a folder of pictures into correctly labeled yearbook entries.
A typical CSV needs these columns:
- Rename every image file to match its row in the CSV exactly.
- Compress the folder into a ZIP if your uploader requires it.
- Upload the ZIP and CSV together, then run the platform's mapping preview.
- Fix any flagged mismatches before finalizing the import.
Pro Tip: Run a test batch of 10 to 20 records first. A downloadable CSV template with matching example filenames catches formatting errors before they multiply across 400 student photos.
How Do You Verify Uploads and Fix Common Errors?
Check three things after any upload: the confirmation message or email, the uploader's gallery or roster list showing your new files, and whether metadata fields actually populated instead of sitting blank.
The most frequent problems advisers run into:
- Low-resolution images that don't meet the 300 DPI minimum
- Wrong or inconsistent filenames that don't match the CSV
- Watermarked photos or screenshots submitted instead of originals
- Timeouts on oversized ZIP files
- Incorrect color or exposure that gets a photo flagged for rework
- Re-export the original file at full resolution rather than a resized copy.
- Rename mismatched files to match your CSV exactly.
- Split oversized ZIPs into smaller batches.
- Clear your browser cache or switch browsers if uploads keep stalling.
- Escalate to support if mapping errors persist or you never receive confirmation the school's files arrived.
When Are Yearbook Photo Deadlines, and What Happens Next?
Schools set firm cutoffs for senior portraits and event galleries, and most publishers simply won't accept late files once design pages lock. After you upload, expect a review queue, followed by design placement and a proofing window where you can flag corrections before print.
- Confirm your project's exact deadline in writing and share it early with staff.
- Ask your publisher how long the proofing window lasts.
- Know whether replacements after that window are possible or off the table.
How Does TrailMark Yearbooks Support Photo Uploads?
Trailmarkyearbooks builds its production process around the reality that most advisers are doing this job on top of a full teaching or administrative load. Free design assistance comes standard, along with flexible design options through Canva, Adobe InDesign, or Trailmarkyearbooks's own online creator, so your team isn't locked into software nobody on staff actually knows.
Practical help includes CSV mapping support, bulk upload troubleshooting, and photo-quality checks before files go to layout, backed by published resources like a yearbook photography checklist advisers can hand straight to staff and parents.
Backed by more than 50 years of combined experience, Trailmarkyearbooks pairs every school with a dedicated adviser contact rather than a rotating support queue, so questions about a stuck upload or a mismatched CSV get answered by someone who already knows your project.
- Dedicated adviser support, not a general help desk
- Fast 2 to 3 week production turnaround once files are finalized
- School-first approach built around adviser workflows, not enterprise sales cycles
An Adviser's Take on Getting Uploads Right
Batching uploads by classroom, not by student, saves you hours. Set one firm deadline and repeat it constantly, since half of late submissions come from families who never saw the first email. Hold a short proofing session with your team before final submission.
Pro Tip: Keep a simple audit CSV logging who uploaded what and when. It settles disputes about missing photos in about thirty seconds instead of a week of email back and forth.
Want Uploads Off Your Plate Entirely?
If chasing down CSVs and re-explaining file specs to parent volunteers isn't how you want to spend your fall semester, Trailmarkyearbooks handles the upload workflow directly rather than leaving you to troubleshoot it alone. That's the real difference from managing uploads solo: a dedicated adviser reviews your files, maps your CSV, and flags quality issues before they become deadline emergencies.

Full-service upload handling, CSV mapping, and photo quality checks come with hands-on adviser support, whether you need help with one tricky bulk import or want someone managing the whole collection process this year. That saves staff time, cuts down on rejected files, and keeps your proofing window from turning into a scramble.
Ready to see how it works with your school's actual files? Request a sample upload and get a real answer instead of a sales pitch.
Frequently Asked Questions
What file format do yearbook uploaders require? Most platforms require high-quality JPEG files at a minimum of 300 DPI. Check your specific project's stated specs since requirements vary by publisher.
Why was my uploaded photo rejected? Common causes include low resolution, watermarks, incorrect filenames, or submitting a screenshot instead of the original file. Re-export from the original source at full resolution to fix most rejections.
Can I replace a photo after I've already submitted it? Usually yes, but only within the proofing window before design placement locks. Check your project's turnaround timeline to confirm how much time you have.
Do I need parental consent for every photo upload? Yes. Every submitted photo should have documented consent attached, whether through a digital checkbox at upload or a signed form kept on file.
What's the fastest way to upload photos for an entire class? Bulk upload with a ZIP file and matching CSV mapping is fastest for large batches. Test a small sample of 10 to 20 records first to catch mapping errors early.